

How to Create an Engaging Short Film with AI
This guide will take you step by step through how to use AI tools to create high-quality short films. Starting from a simple reference image, you can leverage powerful tools like Nano Banana Pro, Kling AI, and CapCut to build a coherent story and visual feast. This technique originates from creative sparks in the AI community, allowing ordinary creators to easily produce professional-level work without expensive equipment or large teams.
1. Origins and Final Product Showcase
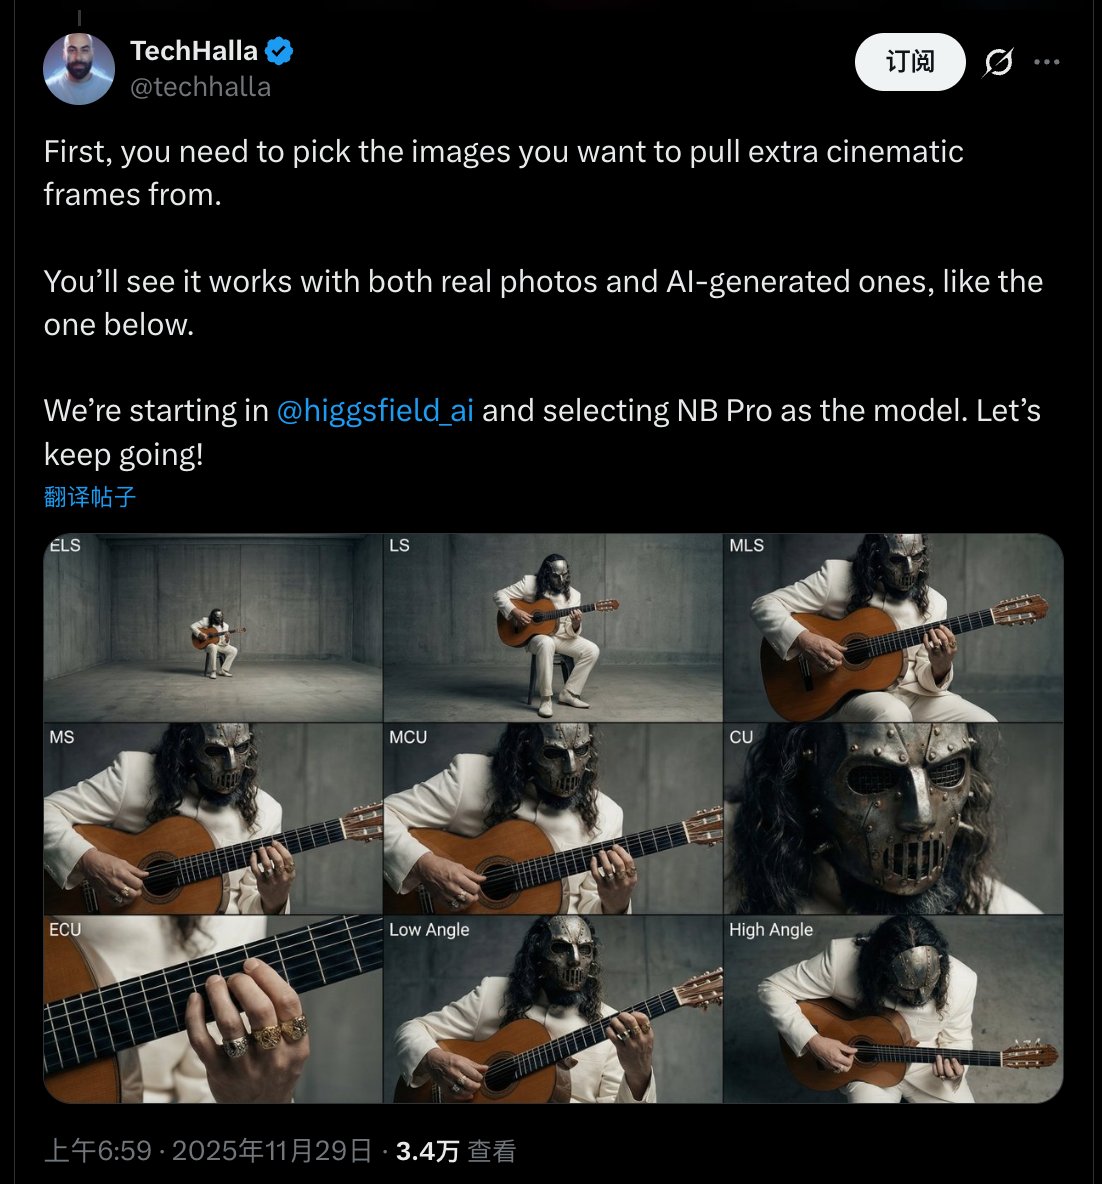
The inspiration for this method comes from the AI enthusiast community on the X platform. Initially, user @techhalla shared two prompts for Nano Banana Pro that can transform an uploaded image into a movie-style grid storyboard and extract frames to create videos. Using Higgsfield AI as an example, these prompts demonstrated how to quickly build storyboards. However, the original prompts often generated frames from different camera angles, leading to poor continuity during final editing and making it difficult to form smooth segments.
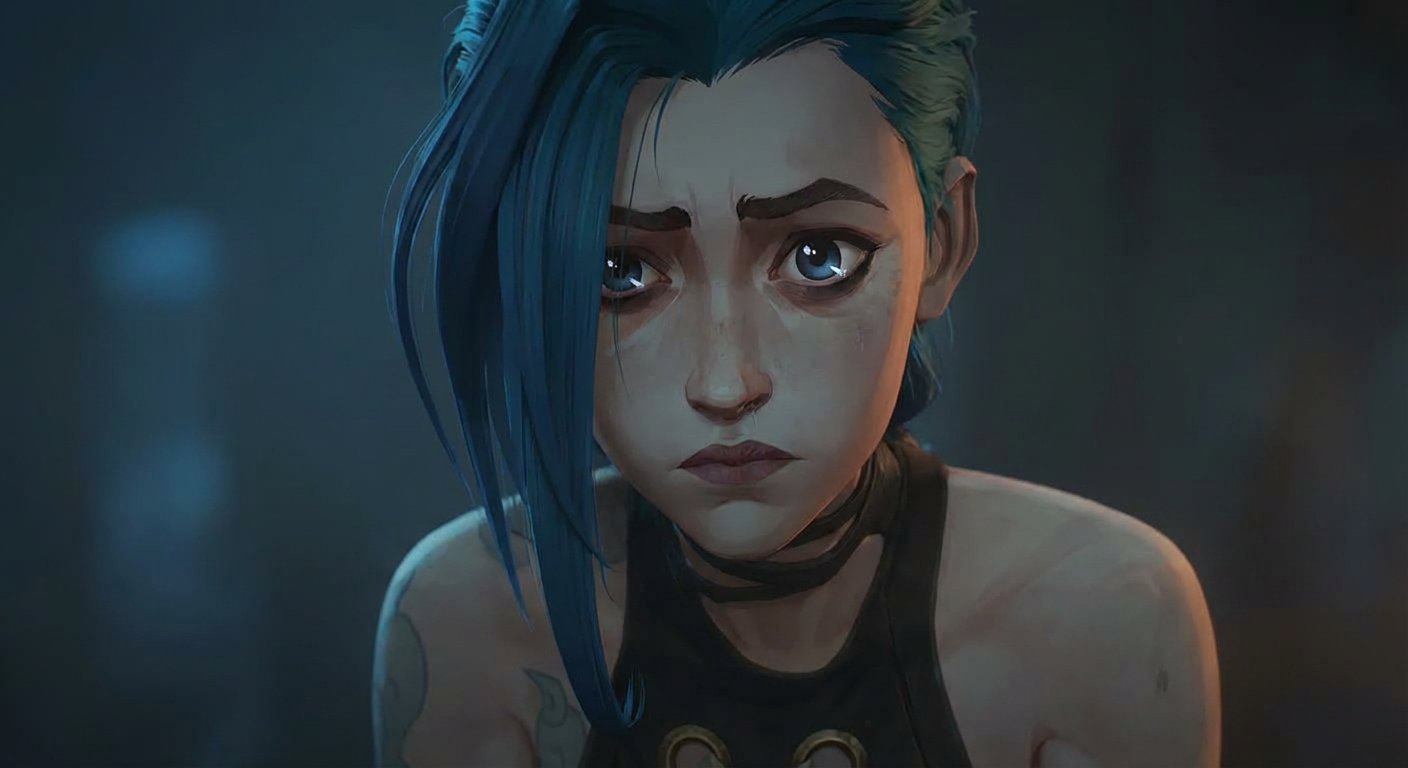
Subsequently, the founder of this website, Underwood, cleverly optimized these prompts, emphasizing the expansion of key frames under the same scene and storyline to ensure higher continuity. His posts were published on November 30 and December 1, 2025, quickly gaining traction with over 500,000 views and thousands of interactions. Underwood shared multiple test cases, including Game of Thrones-style dragon scenes, Harry Potter magic duels, Lord of the Rings epic elements, and Zelda-like adventure shots. These storyboards vividly demonstrate how AI can generate 9-12 continuous key frames from a single image, combining them into 10-20 second short sequences. Below is an example of a purely AI-made short film, fully showcasing the process from key frames to the final product.
2. How to Make It?
Below is a detailed operational process that can be completed using free or subscription-based AI tools. Assume you have prepared a reference image (such as a movie screenshot or original picture), with the goal of creating a 10-20 second short film.
2.1. Generate Key Frames with Nano Banana

First, use Nano Banana Pro (an image generation tool based on Gemini 3 Pro) to create a storyboard. The core of this step is Underwood's optimized prompt, which expands the reference image into a sequence of continuous key frames.
-
Steps:
- Access Nano Banana Pro (via Gemini or other related platforms).
- Upload your reference image.
- Input the optimized prompt (below is the complete version provided by Underwood):
<role> You are an award-winning trailer director + cinematographer + storyboard artist. Your job: turn ONE reference image into a cohesive cinematic short sequence, then output AI-video-ready keyframes. </role> <input> User provides: one reference image (image). </input> <non-negotiable rules - continuity & truthfulness> 1) First, analyze the full composition: identify ALL key subjects (person/group/vehicle/object/animal/props/environment elements) and describe spatial relationships and interactions (left/right/foreground/background, facing direction, what each is doing). 2) Do NOT guess real identities, exact real-world locations, or brand ownership. Stick to visible facts. Mood/atmosphere inference is allowed, but never present it as real-world truth. 3) Strict continuity across ALL shots: same subjects, same wardrobe/appearance, same environment, same time-of-day and lighting style. Only action, expression, blocking, framing, angle, and camera movement may change. 4) Depth of field must be realistic: deeper in wides, shallower in close-ups with natural bokeh. Keep ONE consistent cinematic color grade across the entire sequence. 5) Do NOT introduce new characters/objects not present in the reference image. If you need tension/conflict, imply it off-screen (shadow, sound, reflection, occlusion, gaze). </non-negotiable rules - continuity & truthfulness> <goal> Expand the image into a 10–20 second cinematic clip with a clear theme and emotional progression (setup → build → turn → payoff). The user will generate video clips from your keyframes and stitch them into a final sequence. </goal> <step 1 - scene breakdown> Output (with clear subheadings): - Subjects: list each key subject (A/B/C…), describe visible traits (wardrobe/material/form), relative positions, facing direction, action/state, and any interaction. - Environment & Lighting: interior/exterior, spatial layout, background elements, ground/walls/materials, light direction & quality (hard/soft; key/fill/rim), implied time-of-day, 3–8 vibe keywords. - Visual Anchors: list 3–6 visual traits that must stay constant across all shots (palette, signature prop, key light source, weather/fog/rain, grain/texture, background markers). </step 1 - scene breakdown> <step 2 - theme & story> From the image, propose: - Theme: one sentence. - Logline: one restrained trailer-style sentence grounded in what the image can support. - Emotional Arc: 4 beats (setup/build/turn/payoff), one line each. </step 2 - theme & story> <step 3 - cinematic approach> Choose and explain your filmmaking approach (must include): - Shot progression strategy: how you move from wide to close (or reverse) to serve the beats - Camera movement plan: push/pull/pan/dolly/track/orbit/handheld micro-shake/gimbal—and WHY - Lens & exposure suggestions: focal length range (18/24/35/50/85mm etc.), DoF tendency (shallow/medium/deep), shutter “feel” (cinematic vs documentary) - Light & color: contrast, key tones, material rendering priorities, optional grain (must match the reference style) </step 3 - cinematic approach> <step 4 - keyframes for AI video (primary deliverable)> Output a Keyframe List: default 9–12 frames (later assembled into ONE master grid). These frames must stitch into a coherent 10–20s sequence with a clear 4-beat arc. Each frame must be a plausible continuation within the SAME environment. Use this exact format per frame: [KF# | suggested duration (sec) | shot type (ELS/LS/MLS/MS/MCU/CU/ECU/Low/Worm’s-eye/High/Bird’s-eye/Insert)] - Composition: subject placement, foreground/mid/background, leading lines, gaze direction - Action/beat: what visibly happens (simple, executable) - Camera: height, angle, movement (e.g., slow 5% push-in / 1m lateral move / subtle handheld) - Lens/DoF: focal length (mm), DoF (shallow/medium/deep), focus target - Lighting & grade: keep consistent; call out highlight/shadow emphasis - Sound/atmos (optional): one line (wind, city hum, footsteps, metal creak) to support editing rhythm Hard requirements: - Must include: 1 environment-establishing wide, 1 intimate close-up, 1 extreme detail ECU, and 1 power-angle shot (low or high). - Ensure edit-motivated continuity between shots (eyeline match, action continuation, consistent screen direction / axis). </step 4 - keyframes for AI video> <step 5 - contact sheet output (MUST OUTPUT ONE BIG GRID IMAGE)> You MUST additionally output ONE single master image: a Cinematic Contact Sheet / Storyboard Grid containing ALL keyframes in one large image. - Default grid: 3x3. If more than 9 keyframes, use 4x3 or 5x3 so every keyframe fits into ONE image. Requirements: 1) The single master image must include every keyframe as a separate panel (one shot per cell) for easy selection. 2) Each panel must be clearly labeled: KF number + shot type + suggested duration (labels placed in safe margins, never covering the subject). 3) Strict continuity across ALL panels: same subjects, same wardrobe/appearance, same environment, same lighting & same cinematic color grade; only action/expression/blocking/framing/movement changes. 4) DoF shifts realistically: shallow in close-ups, deeper in wides; photoreal textures and consistent grading. 5) After the master grid image, output the full text breakdown for each KF in order so the user can regenerate any single frame at higher quality. </step 5 - contact sheet output> <final output format> Output in this order: A) Scene Breakdown B) Theme & Story C) Cinematic Approach D) Keyframes (KF# list) E) ONE Master Contact Sheet Image (All KFs in one grid) </final output format> - Generate the storyboard: The AI will output a 3x3 or similar grid image, with each cell being a key frame, accompanied by labels such as KF#, duration, and shot type.
-
Tips: If the prompt is too long, you can screenshot it and input it. During testing, choose a clear reference image to prevent AI from introducing irrelevant elements.
2.2. Fill Transition Shots with Kling's "Start/End Frame Reference"
First, obtain high-resolution images of each key frame as the starting and ending frames for the video. You can extract these frames using Nano Banana Pro, for example, with a prompt like "Extract the image content from row x, frame x, and remove black borders."
Next, use Kling AI to fill in the transitions between key frames, generating coherent video segments. Kling supports start/end frame references and can automatically create intermediate content.
-
Steps:
- Access the Kling AI creative interface.
- Click the "Start & End Frames" icon, upload the first frame from the storyboard as the start, and the last frame as the end.
- Input a prompt: For example, "Start with [start frame description], end with [end frame description], [add change details, such as character actions or camera movements]." Like, "Start with the dragon overlooking the warrior, end with the warrior drawing his sword and charging, slowly push in the shot, add snow mist effects."
- Optionally set the video duration (3-10 seconds).
- Generate the video: Kling will create transitions based on the prompt, ensuring overall continuity.
-
Tips: Add detailed descriptions to improve accuracy, such as "Maintain the same lighting and atmosphere." If multiple subjects are involved, upload additional reference images (up to 7). This tool supports mixed image and video references.
In this post, the actual operations for generating each segment are detailed.
2.3. Edit and Refine with CapCut
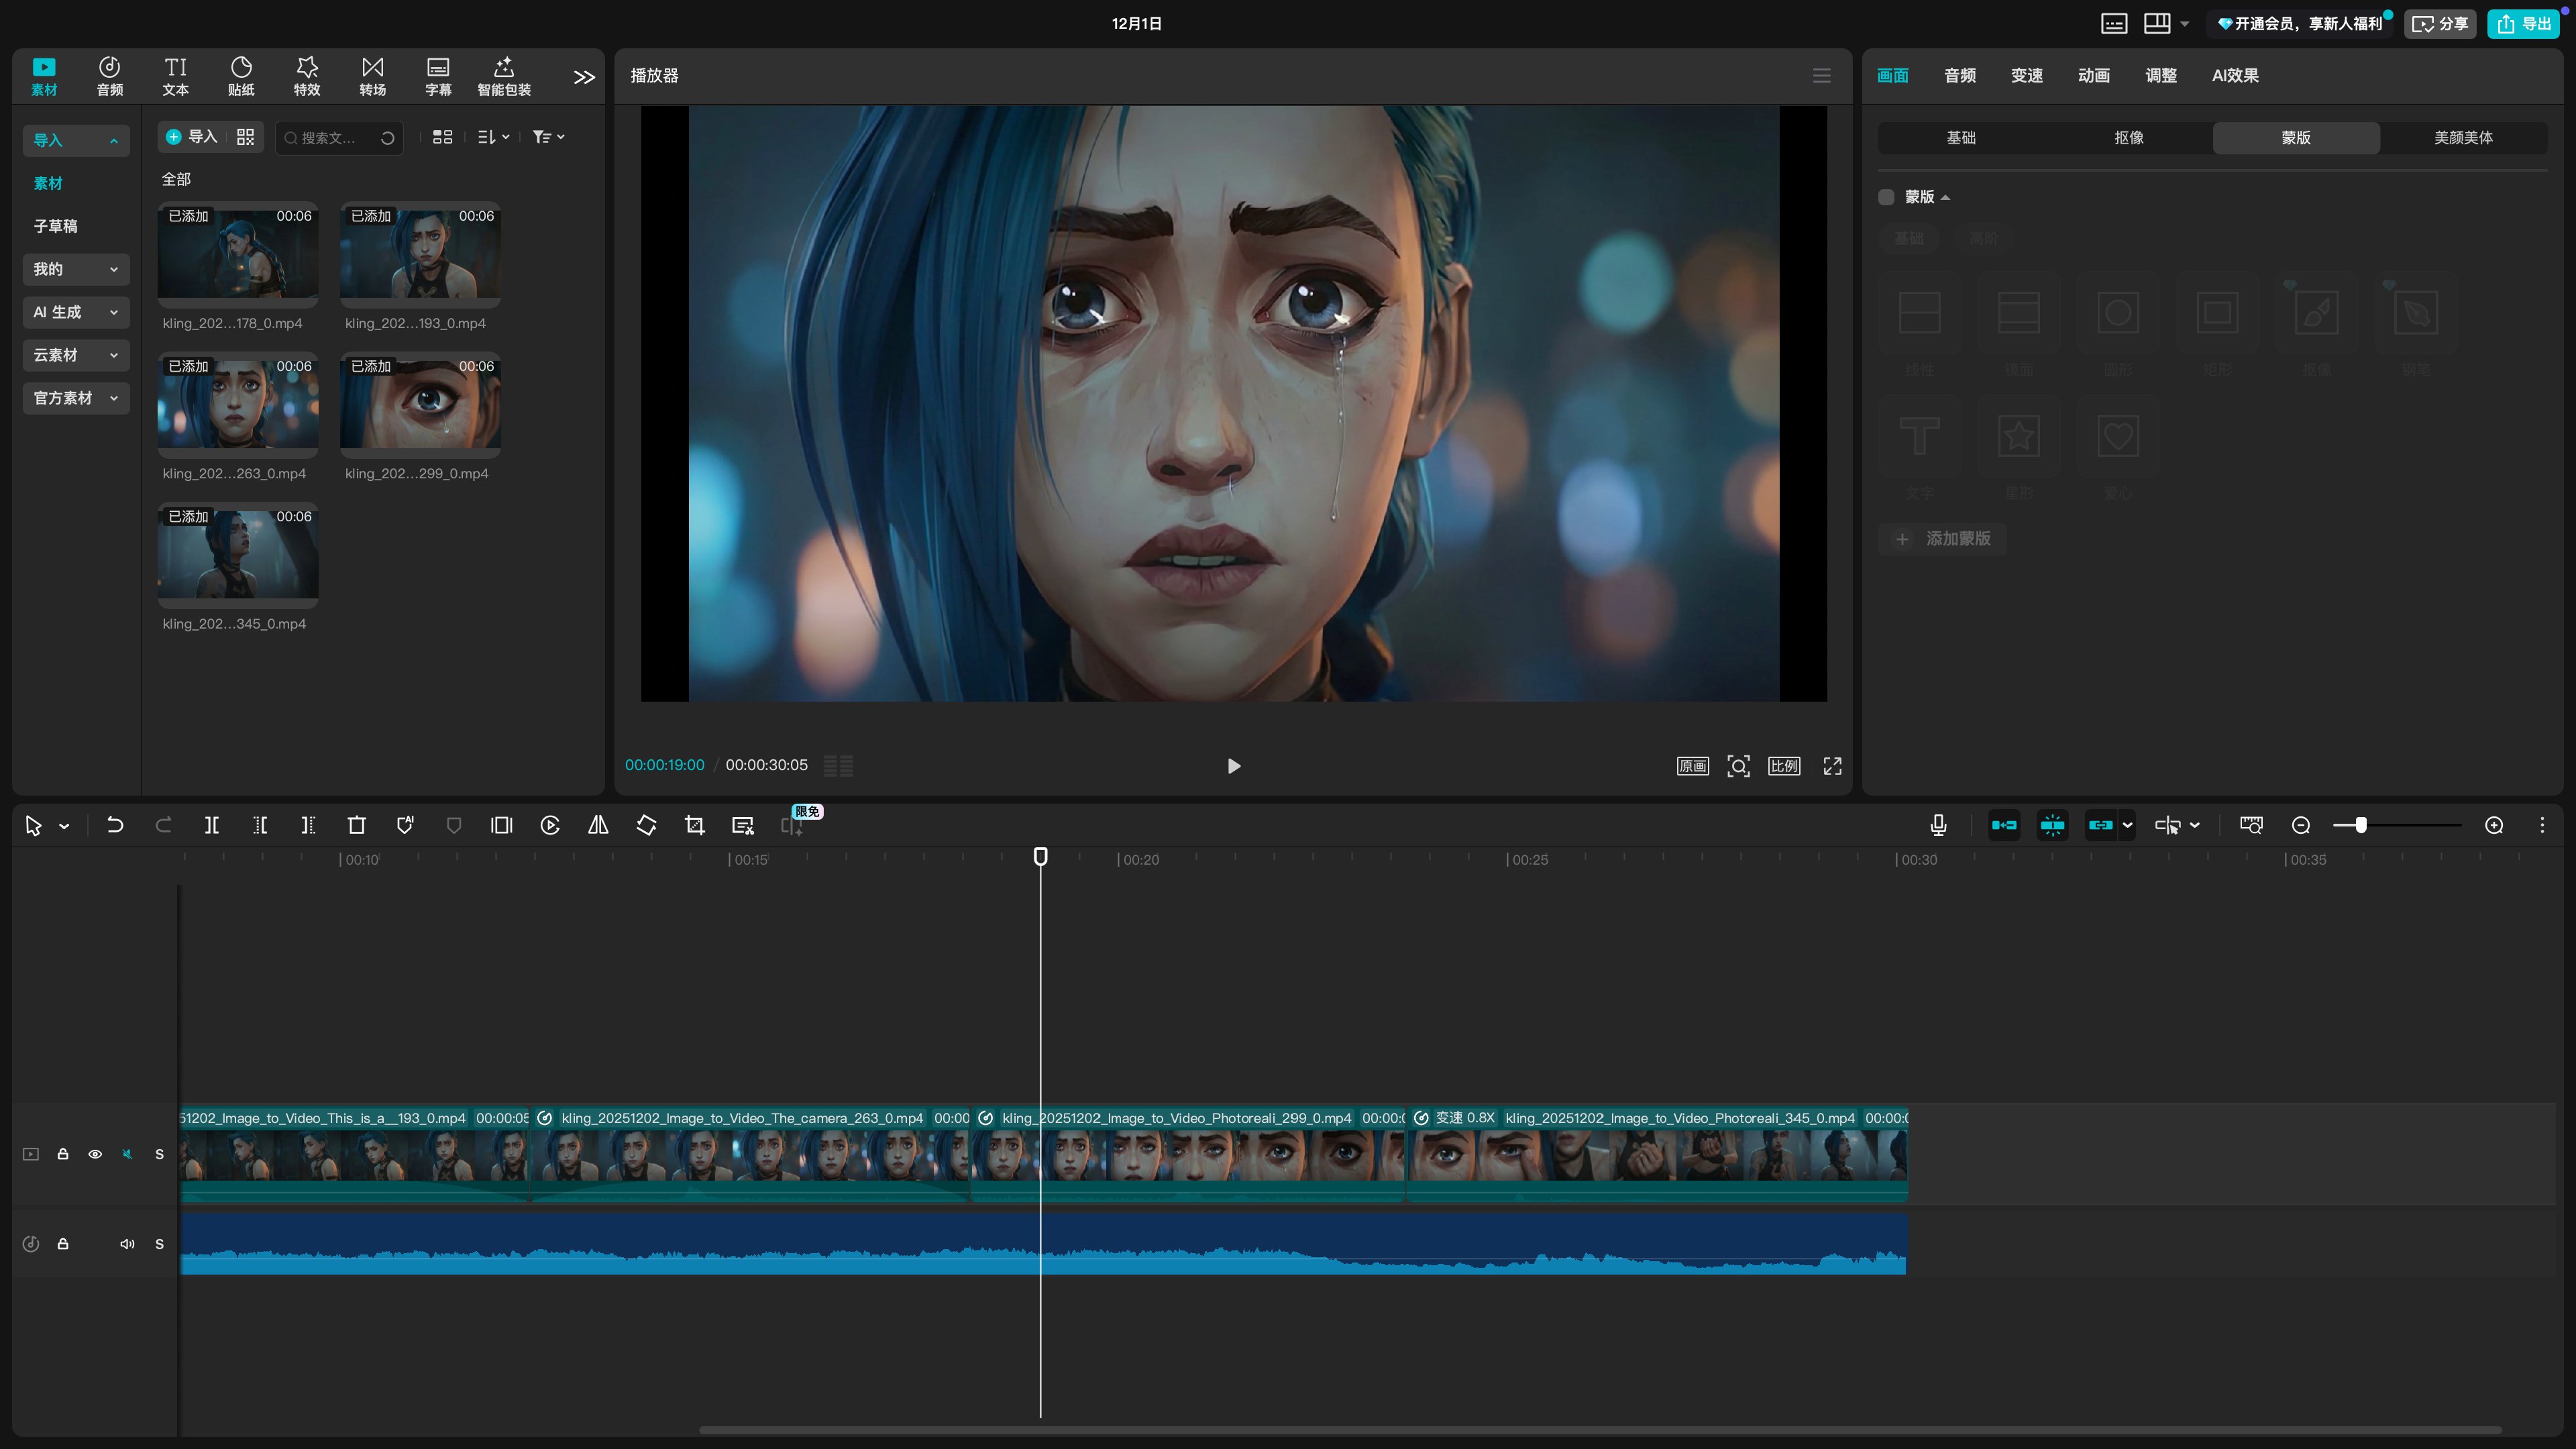
Finally, use CapCut to revise and perform the final editing on the videos. CapCut is a free AI video editor that can generate content from scripts and easily optimize AI-generated segments.
-
Steps:
- Download and open CapCut (supports desktop or mobile versions).
- Import the video segments generated by Kling.
- Use tools: Upload segments, select templates or input scripts for automatic editing (such as adding transitions and effects).
- Manual revisions: Adjust the timeline, add music, text, effects, or trim inconsistent parts. Use AI voice features to generate narration or replace audio.
- Export: Select high-definition resolution to generate the final short film.
-
Tips: If AI generation has flaws (such as unnatural movements), fix them with CapCut's stabilization and speed adjustments. When stitching multiple Kling segments into a complete short film, pay attention to consistent pacing.
3. Challenges and Insights in the Production Process
In actual operations, you may encounter some challenges, but these often spark deeper insights. Community user feedback shows common issues include prompt context pollution, music synchronization difficulties, and the need for manual intervention in transitions. Specifically:
- How to Make AI Generate Story-Driven Visuals: Incorporate character relationships and narrative intentions into prompts to avoid shallow outputs. Also, prevent prompt context pollution—if AI responses are unstable, start a new conversation to re-extract key frames and ensure consistency.
- Writing Prompts in Cinematic Language: Clearly specify shot types, movements, and composition changes to make transitions smoother and enhance professionalism. During Kling generation, if there are gaps in transitions, optimize with detailed descriptions (such as "Slowly push in and maintain the atmosphere"), but ultimately, human intuition is needed for fine-tuning.
- Editing is the True Ceiling of Quality: Shot combinations, pacing control, emotional building, and audio-visual synchronization all rely on post-production, which determines the final success or failure. Especially when adding background music, syncing beats often requires manual intervention; current AI tools cannot perfectly replace this. It is recommended to use CapCut for manual adjustments to speed and transitions to achieve seamless connections.
In summary, AI short film production is like a symphony intertwining screenwriting, directing, and editing: it perfectly blends the magic of technology with human inspiration. If you can skillfully grasp the story's pulse, the poetry of shots, and precisely control every heartbeat rhythm, the final product will bloom with brilliance beyond imagination. This process not only breaks the shackles of traditional creation but also acts as a gateway to infinite creativity, inviting every dreamer to embark on an exploratory journey.


